On this page:
- Prerequisites
- Setup
- Usage
- Connection Settings
- Blueprints
- Glia Connection
- Sensor Data
- Error Handling
- Glia Delegates
- C++
- Testing your setup
- Securing your credentials
- Caveats and limitations
- Next Steps
Prerequisites
This tutorial reviews how to install and use the Omnicept framework inside the Unreal Engine.
Setup
A Unreal plugin folder containing all the required files resides in your installation folder (C:\Program Files\HP\HP Omnicept SDK) for the Omnicept SDK under the Unreal subdirectory. To add the plugin to your project, use the following instructions:
Adding the plugin to your project
To include the Omnicept Plugin for a single project, create a folder named “Plugins” in the root directory for the project and copy the "HPGlia" folder to this folder.
Adding the plugin to the engine
To add this plugin to the Unreal Engine (making it available for all projects), place the "HPGlia" folder in the Unreal Engine plugins folder (e.g. "C:\Program Files\Epic Games\UE_{Version}\Engine\Plugins").
Note:
Regardless of where the plugin is installed, the editor must be restarted for the plugin to be detected. The compiled plugin is built for UE 4.25, 4.26, and 4.27. Using the plugin on another engine version will cause the editor to display a prompt suggesting that the plugin is rebuilt. The plugin will only be successfully built if your project has an associated Visual Studio solution file. Adding a C++ file to your project will cause it to generate a Visual Studio solution file. A Blueprint-only project cannot recompile the plugin.
Usage
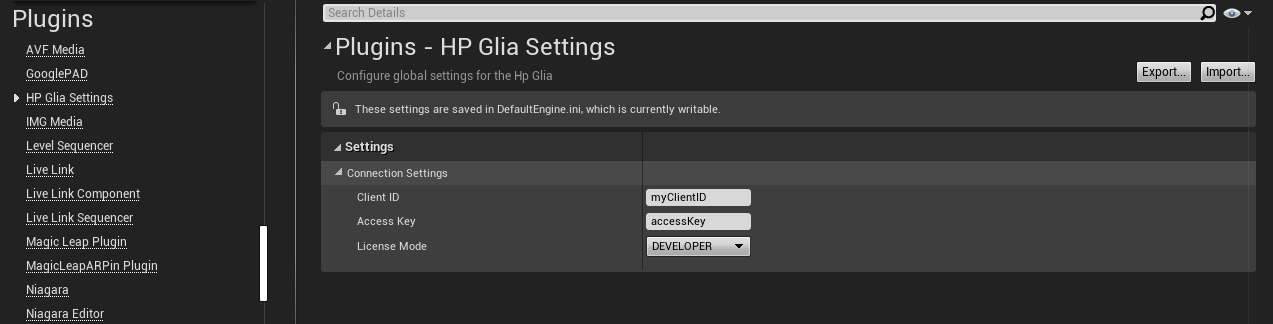
Connection settings
Required licensing information must be entered into the HP Glia Settings plugin menu. Under Edit -> Project Settings -> Plugins -> HP Glia Settings menu, under the Settings header, enter valid licensing information for Client ID, Access Key, and select appropriate License Mode from the drop down (i.e. Developer if you have just downloaded the SDK for the first time, you can confirm in the console). Please refer to the licensing section of this document for additional details on field values.
To test your setup is working with Blueprint, navigate to Test Your Setup. To learn more about the modules, read on.
** If you are using older versions of the SDK you will see REV_SHARE instead of DEVELOPER.
Blueprints
Blueprint functions provide access to the OmniceptAPI. Right-click on empty space within a Blueprint Level editor and type “Glia” to access these functions

Glia Connection
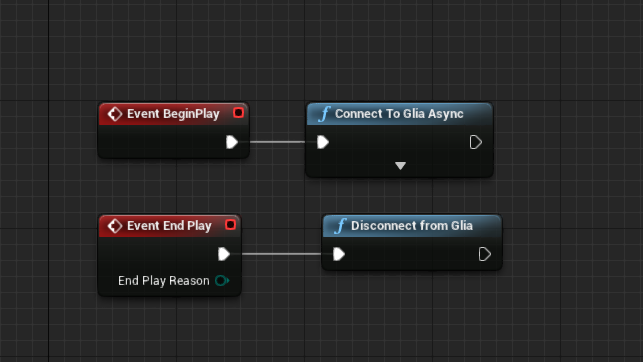
The functions Connect To Glia Async and Disconnect from Glia must be called in sequence during program execution and must be called only once during regular program execution.
- Connect To Glia Async must be called before attempting to retrieve any sensor values.
- Connect To Glia Async asynchronously creates a connection to Glia in order to not block the game thread. The result of the connection may be retrieved by calling Get Glia Delegates.
- Additional: If willing to override the connection settings on the project settings call Connect To Glia Async with the connection parameters.
Edit the Level Blueprint to connect and disconnect from Glia on Event BeginPlay and Event EndPlay events, as shown:
Sensor Data
Once connected, the Glia Plugin will receive sensor data from HP Glia service. Each sensor value is available through Blueprint functions:
- Get Heart Rate
- Get Heart Rate Variability
- Get Camera Image
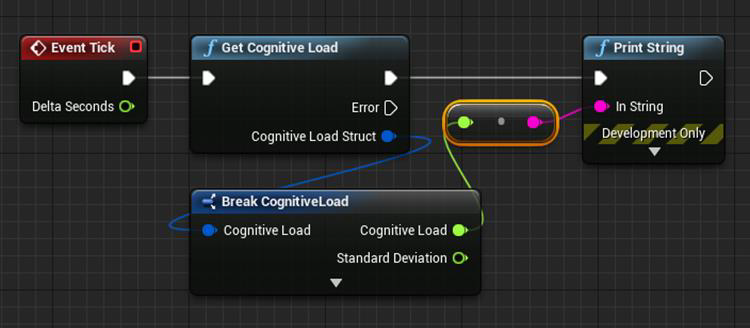
- Get Cognitive Load
- Get Eye Tracking
- Get IMU Array
- Get PPG Array (PPG requires special license)

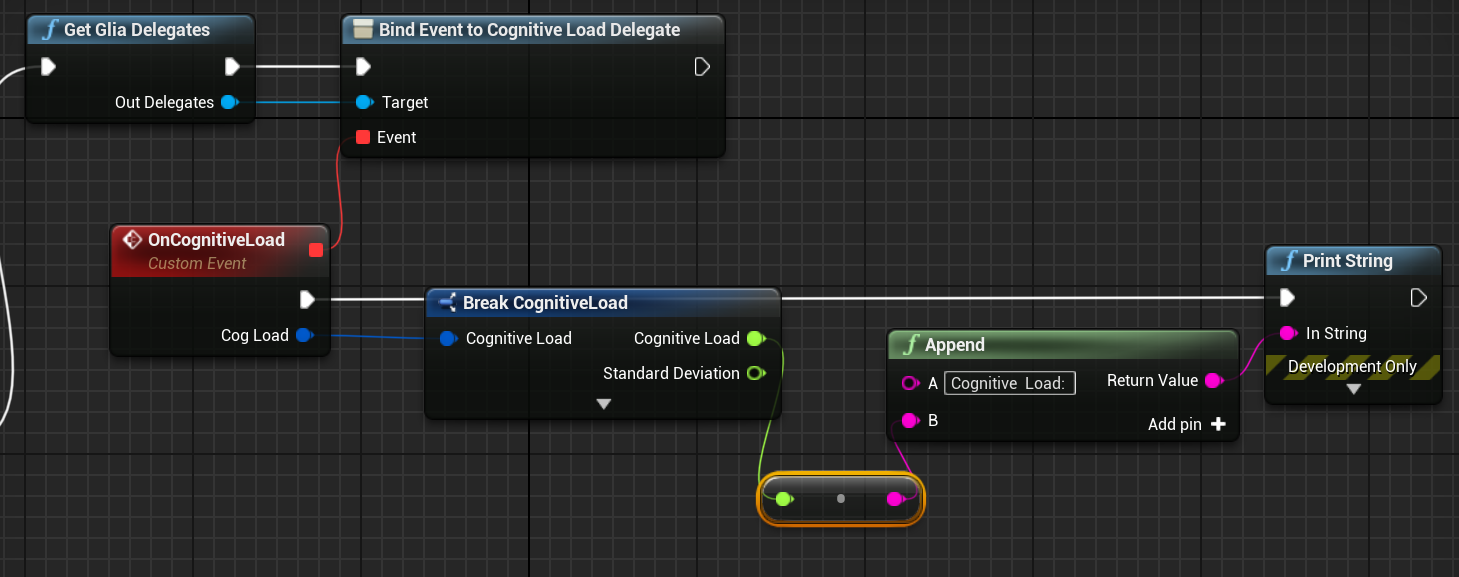
Each function will retrieve the last value received by the UE4 client. No historical data is stored on the client-side by the Glia plugin. Application developers may implement their own methods to store data for historical analysis of sensor data over time periods. The following sample Blueprint illustrates how the cognitive load value may be accessed and printed to the debug console
Error Handling
Some HP Glia Blueprint nodes have multiple execution exit paths: an unlabeled exit and an error exit. The unlabeled execution path is used when the Blueprint node is executed successfully. The error execution path is used by Glia in lieu of throwing exceptions. If the error execution path is followed during program execution, any value retrieved from the corresponding Blueprint node is invalid.
Glia Delegates
Connection events and some Glia sensor data may be received via delegates. These delegates will fire when new sensor data arrives or when a connection event occurs. To get the Glia Delegate Object use the function GetGliaDelegates. There are the following bind-able delegates:
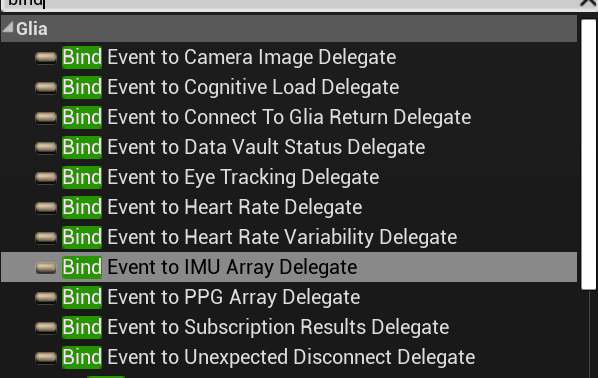
*Note that PPG needs special licensing to access.
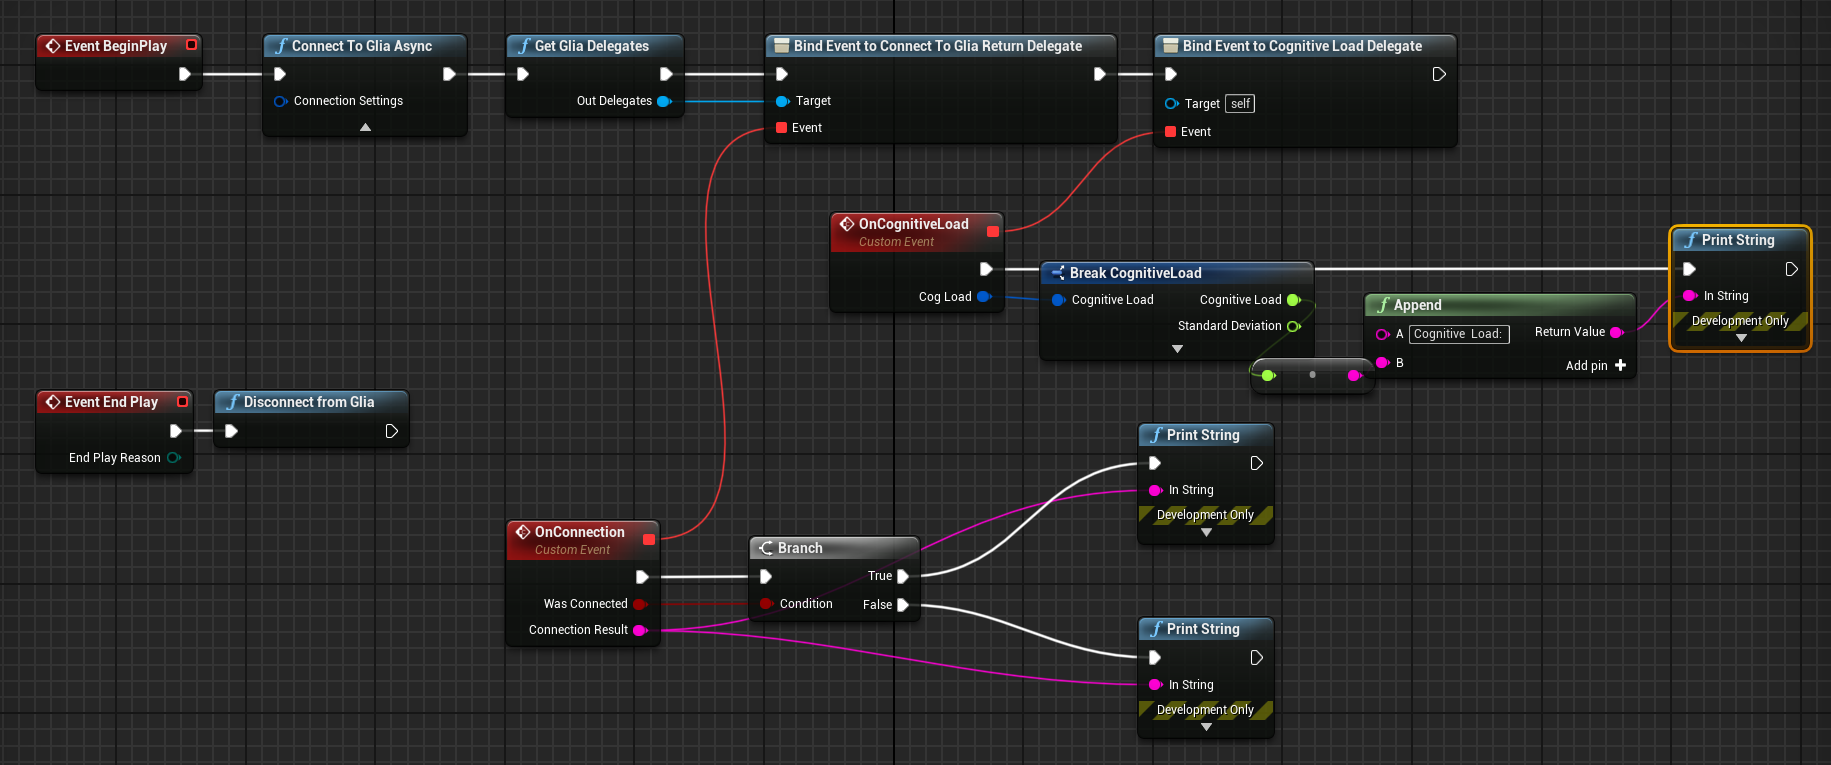
When connecting all together it will look as the following image:
From the top images, you may have noticed that there are two bindable delegates for Connection Events. If these delegates are bound after ConnectToGliaAsync is called, the events may be missed. The events for this are the following two:
- ConnectToGliaReturnDelegate: If already connected to Glia, this delegate will not fire on future ConnectToGliaAsync calls
- UnexpectedDisconnectDelegate: will notify all events bound to it to inform that Glia has disconnected from the client.
- Note: calls to DisconnectFromGlia will not cause this delegate to fire.

C++
Unreal plugin also provides the possibility to write your code in C++ offering the same functionality that it does on the blueprint side. For doing this you will need to follow the next steps:
1. Aadd HPGlia as a dependency on your Module rules:
PublicDependencyModuleNames.AddRange(new string[] { "HPGlia" });
2. Inlude the HP Glia Client header:
#include "HPGliaClient.h"
3. Start using glia functionalities:
UHPGliaClient::ConnectToGliaAsync("MyClientID", "MySecret", ELicensingModel::REV_SHARE);
More examples on how to use C++ can be found here.
Testing your setup
Let's check that everything is hooked up:
1. Open the Level blueprint (Blueprint> Open Level Blueprint)
2. On Event BeginPlay: We will call Connect to Glia Async and then we will bind events to the ConnectToGliaReturnDelegate and CognitiveLoadDelegate. With these events for now we will just print them on the screen.
3. On Event EndPlay: We will disconnect from glia.
4. Compile and save the level blueprint.
5. Play the level.
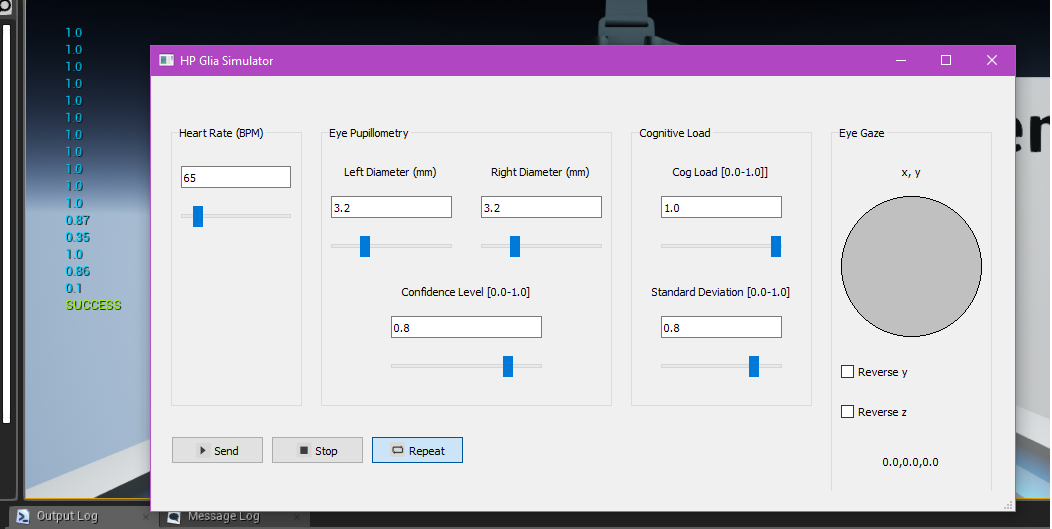
6. To test- run the Glia Simulator (search "HP Glia Simulator" in Windows search) hit send and confirm that changing cognitive load simulator settings shows in your level scene view.
To prevent Client ID and Access Key values being readable in a packaged project, enable encryption for initialization files. Under Edit -> Project Settings -> Project -> Crypto click "Generate New Encryption Key" button, then check the box for "Encrypt Pak Ini Files".

Caveats and limitations
The provided DLL was compiled against UE 4.25, 4.26, and 4.27. The associated code will allow you to recompile the plugin for later versions as well. To do so, make sure you have a Visual Studio solution for your project. When launching your project, the editor will ask to recompile the plugin.
Next Steps
Congratulations! You have a working project with Omnicept now you might want to check some examples on how to use glia data or review sensor fundamentals.